Imagine this: It’s a scorching afternoon, the living room feels like an oven, and you’re desperate for a breeze. You throw open a window… and nothing. Stale air just sits there like an uninvited guest. We’ve all been there, fanning ourselves with magazines and wishing for a gust of wind. The secret sauce you’re missing is something called wind-assisted natural horizontal ventilation – basically a fancy term for letting the natural breeze flow straight through your home. And guess what? It’s all about how you use your windows and doors.
Let’s cut to the chase: when performing wind-assisted natural horizontal ventilation, windows and doors are your best friends — but only if you use them the right way. In this GQ-style guide to home comfort (yes, we’re making ventilation stylish), we’ll dive into how to turn your house into a breezy paradise. Get ready for witty tips, a bit of science, and real-world tricks to transform that stuffy room into a cool haven, all without touching the AC.
So grab a cold drink, sit back, and let’s catch that natural A/C known as wind! By the end, you’ll know exactly what to do when the heat is on and the air is still. Let’s make your home cooler, fresher, and infinitely more comfortable using just windows, doors, and a little wind know-how.
Also Read: Which Air Movement Equipment Is Used to Position Smoke Ejectors and Fans in Doors and Windows?
What is Wind Assisted Natural Horizontal Ventilation?
Wind-assisted natural horizontal ventilation is a mouthful, but it’s basically a chic term for cross-breezing your home. It means using the natural wind (no fans, no gadgets) to push fresh air horizontally through your space. Picture opening a window on one side of your house and another directly across – the breeze enters from the windward side (where the wind blows in) and exits on the leeward side (where the wind blows out). This creates a continuous airflow that sweeps through your rooms, replacing hot, stale air with cool, fresh air. Think of it as nature’s free air conditioning system working sideways through your home.
Here’s the science made simple: wind hitting your house creates high pressure on the side it hits (windward) and low pressure on the opposite side (leeward) By opening windows or doors on both sides, you’re giving that high-pressure air a path to rush toward the low pressure – voila, a breeze through your living room!. The cool part (literally): even a gentle breeze can make a big difference in comfort.
According to building design experts, an indoor air flow of about 160 feet per minute (that’s roughly a light 1.8 mph breeze) can make the room feel up to 5°F cooler. Not too shabby for Mother Nature, right?
Natural horizontal ventilation is nothing new – our grandparents designed homes with big porches and aligned windows to catch breezes long before AC was common. It’s wind-assisted because we’re harnessing whatever breeze is available outside. No wind? No go – this technique shines when there’s at least a light wind blowing. But when conditions are right, it’s magic. You get fresh air circulating without any electrical hum or high energy bills. It’s also great for keeping indoor air quality up – blowing out odors, pollutants, even moisture (goodbye, stuffiness and mildrew!).
In short, wind-assisted ventilation is the art of letting the wind do the work of cooling and ventilating your home, naturally and horizontally (through windows and doors on the same level).

By the way, don’t confuse this with the “stack effect” (where hot air rises and escapes upward – that’s vertical ventilation). Horizontal ventilation is all about the cross-breeze – wind in, wind out, sideways through your space. It’s the technique you use when you open front and back doors on a nice day and feel that delightful draft. Now that we know what it is, let’s talk about why your windows and doors are the MVPs of this natural cooling method.
Why Windows and Doors Matter (A Lot)
When it comes to natural ventilation, windows and doors aren’t just architectural features – they’re the gatekeepers of airflow. If wind-assisted ventilation were a rock band, windows and doors are the lead singers and the drummer, absolutely crucial for a great performance. Here’s why they matter so much:
They’re the Entry and Exit Points:
In a cross-breeze, one opening lets fresh air in, and another lets old air out. Your windows and doors literally set the stage for how air travels. A poorly placed or undersized opening can choke the breeze, while a well-positioned large window can flood your room with air. The size and placement of these openings directly control how much ventilation you get.
Not All Windows are Created Equal
Different window styles = different ventilation potential.
For example, a tiny basement hopper window will never catch as much breeze as a wide-open casement window.
Casement windows (the kind that crank open on a hinge) act like sails – they can catch side breezes if angled correctly.
Double-hung windows (the classic slide-up ones) only open halfway at most, so they pass less air. And sliding windows open one panel’s width, which is about 50% of the window area. In contrast, louvered windows (jalousie style) can open almost 100% for max airflow. Even an open door (especially a big patio door) can move a lot more air than a small window. The bottom line: the type and size of window/door hugely affect how much breeze you’ll get.
Doors Count Too
Don’t ignore doors in your ventilation game. Ever opened your front door and back door to get a nice draft? Doors can create supersized openings for air to travel. A door with a screened storm door, for instance, is basically a giant window you can walk through. Also, modern door designs sometimes include ventilation panels or louvers – check out our Modern Door Designs for Airflow guide for some stylish examples. If you have an open-concept home, interior doors (bedroom, bathroom doors, etc.) matter too – leave them ajar to let the air stream through the whole floor.
To visualize how different windows stack up for ventilation, here’s a quick comparison chart:

Comparison Chart: Approximate maximum ventilation opening of various window types. As you can see, fixed windows offer 0% (no ventilation), sliding and double-hung windows around 50% (half the window area opens), awning windows ~80%, casement ~90%, and louver (jalousie) windows approach 100% opening. Bigger openings = more airflow!
In short, windows and doors are the heroes of natural ventilation. If you’ve got great ones and you use them smartly, your home can essentially breathe. They matter for controlling not just comfort, but also things like humidity and air quality. (Ever notice condensation on windows? That’s poor ventilation at work.) And if you’re thinking of upgrades, you might want to invest in window styles that boost airflow – our Best Windows for Ventilation roundup covers some top choices.
So, yes, size, type, and placement of openings all matter a lot. But equally important is how you use what you have. Let’s talk about positioning and strategy – because even the best windows won’t help if you don’t open the right ones at the right time!
How to Position Your Windows and Doors for Max Airflow
Setting up a wind-assisted cross-breeze is a bit like arranging a perfect date between the wind and your house. You want to position openings so that air comes in, flows through, and goes out smoothly. Here are the keys to maximizing airflow:
Open the Right Windows (Upwind & Downwind)
First, figure out where the breeze is coming from. Stand outside and feel which direction the wind is blowing (a simple flag or windsock can help). The side of your home facing the wind is the upwind (windward) side, and the opposite is downwind (leeward). For maximum airflow, open a window/door on the upwind side and one on the downwind side. This creates that sweet pressure differential: high pressure pushes air in on the windy side, and low pressure pulls it out on the far side. The air will whoosh through your rooms, following the path you’ve opened. If you only open windows on one side, you’ll just get a gentle in-and-out on the same side (single-sided ventilation), which is far less effective. So always think in pairs: an inlet and an outlet.
Start with the Outlet (Leeward) Side
Here’s a pro move most people don’t know – open the downwind side first, then the upwind side. Why? By opening the outlet side (where air will exit) initially, you create a slight vacuum that begins drawing air through. When you then open the windward side, fresh air rushes in to fill that low pressure. This sequence makes the airflow start more gently and prevents a sudden blast. It’s the same strategy firefighters use to clear smoke: “windows and doors on the downwind side of the structure should be opened first”. If you do the opposite (open the windy side first), you might pressurize the room with nowhere for air to go, which can actually stall the airflow or make it turbulent. So remember: leeward first, windward second.
Align Openings for a Clear Path
Ideally, the inlet and outlet should be roughly opposite each other so air can travel straight through. If your home’s layout allows, open windows that face each other across the room or hall. The straighter the shot, the stronger the breeze. However, an interesting twist: they don’t have to be perfectly aligned like a sniper shot – in fact, having them slightly offset can encourage the air to mix around the room rather than just beeline out. For example, open one window a bit to the left, and the opposite one a bit to the right of it, so the air swirls a little through the space. The key is no major obstacles in between (like a big wardrobe or a wall without a doorway).
Use Doors as Air Highways
Open exterior doors on one side and windows on the other if that works better. Say the wind is coming from the front of the house: opening your front door (with a secure screen, hopefully) and a rear window can create a huge cross-breeze through the living area. Keep interior doors open too, so the breeze isn’t stopped in its tracks. If privacy is an issue (say you want bedroom doors closed), you can at least open them periodically or use door stop vents. Additionally, if you have a two-story home, try to align upstairs and downstairs openings. Although wind-driven ventilation is mostly horizontal, a bit of vertical movement helps: for instance, open a downstairs window on windward side and an upstairs window on leeward side – the breeze will travel up and through, cooling both levels.
Mind the Angles and Tricks
Wind doesn’t always blow perfectly perpendicular to your wall. If it’s coming at an angle or along the wall, you can use window angles to your advantage. Casement windows are excellent here: hinge them so that the open pane “catches” the wind. For instance, if wind flows along your wall from east to west, a casement window that opens out and hinges on the east side can scoop that wind in, while another window hinged on the opposite side can help suck air out. It’s like setting a trap for the breeze – and it works! If you don’t have casements, even propping an inward-opening door a certain way can channel the air (just be careful of slamming).

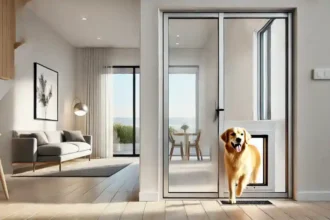
A modern living room with wide open louvered windows on both sides, creating a powerful cross-breeze (represented by the blue arrows). Positioning openings directly across from each other (or slightly offset) lets wind stream through and cool the space efficiently.
Optimize Opening Sizes:
If you can, play with how wide each window is opened. Sometimes, cracking one window just halfway and the other fully can speed up the airflow. There’s a physics principle where the flow rate is limited by the smaller opening – air will only move as fast as the narrowest point allows. So if you have one small window and one big one in your cross-breeze pair, the small one will bottleneck the flow. In such cases, open that small one as much as possible (or open two small ones) to increase the effective area. Generally, the more balanced the size of inlet vs outlet, the better the flow. If one side has double windows, you can open both to match the single large window on the other side, for example.
By positioning your windows and doors with these tactics, you’ll create a wind tunnel of comfort through your home. It might take a bit of experimenting (“Should I open the kitchen window or the dining slider as the outlet?”), but you’ll quickly feel which combo gives the best breeze. And once you find the sweet spot, you can literally set the stage for wind to waltz through your house whenever it blows outside.
Next up, let’s save you from some common pitfalls. Even the best intentions can fall flat if you make these oh-so-common ventilation mistakes (don’t worry, we’ve all done them!).
Common Mistakes People Make (and How to Avoid Them)
Going for that natural breeze is pretty straightforward, but there are a few traps people often fall into. Let’s air out these mistakes so you can avoid facepalm moments and get the most from your wind-assisted ventilation:
Mistake 1: Opening Only One Side of the House
We get it, you open one window and hope for the best. But with no exit or entry on the other side, you’re not cross-ventilating at all. This is single-sided ventilation, and it’s far weaker. Without a path through, the air just kind of jiggles in place or barely trickles in.
How to avoid it: Always open at least two openings on opposite sides (or as close to opposite as possible). If your apartment has windows on only one wall, open the main door briefly to get a draft (safety permitting). Remember, it’s called cross-ventilation – you need an entry and an exit.
Mistake 2: Opening Every Window at Once
It sounds counterintuitive, but flinging open all the windows and doors in your home might actually reduce the effectiveness of any one breeze. When everything is open, the wind’s path becomes undefined and weak – it’s like giving a kid too many candy store options, they wander. Too many openings can dilute the pressure difference you need for a strong flow.
How to avoid it: Be strategic. Open the key upwind/downwind pair for the main airflow you want. You can certainly crack a couple of others for secondary breezes, but don’t overdo it or your primary breeze may lose force. Start with the critical two openings, then add more if needed, one by one, checking if the airflow improves or worsens.
Mistake 3: Ignoring Wind Direction (or Changes)
Maybe in the morning the wind comes from the east, but by afternoon it’s from the west. If you set your openings in the morning and never adjust, you could be inviting air out of your house instead of in, or no breeze at all once the wind shifts.
How to avoid it: Pay attention to nature. If the curtains stop billowing, step outside and feel which way the wind is blowing now. Adjust your strategy – you might need to reverse which windows are open and which are closed as the day progresses. A pro tip: Many areas have predictable wind patterns (like a sea breeze in late afternoon); knowing your locale helps. You could also use something like a weather vane or even a smartphone app that shows wind direction to guide you.
Mistake 4: Blocking the Breeze Path
So you’ve opened the right windows, but it still feels stuffy? Check the breeze’s path inside. Do you have a big piece of furniture, a high-back sofa, a shelf, or a wall partition right in between the inlet and outlet? Air is like water; it flows along the path of least resistance. If there’s a couch fortress or a giant wardrobe in the way, the air will detour (or stagnate).
How to avoid it: Arrange your interior with airflow in mind. Leave a clear line of sight (and flow) between opposite windows. In one notable design tip, experts say to avoid partitions perpendicular to the airflow – meaning don’t have a floor-to-ceiling divider blocking the straight line between windows. You don’t need to live in an empty room, just ensure there’s a gap above or below furniture for air to pass. For instance, a bookshelf that doesn’t reach the ceiling can allow air to flow over it. Keep doors open as mentioned, and even open interior transom windows or vents if you have them to connect rooms.
Mistake 5: Forgetting Screens and Safety
In enthusiasm for a gale of fresh air, people sometimes throw open doors and low windows without screens, inviting bugs (or worse, risking a pet escaping or a child’s safety). Or they leave heavy doors unlatched and BANG – a sudden gust slams it shut (startling everyone and possibly shattering glass).
How to avoid it: Always use screens on windows if bugs are a concern (you’ll enjoy your breeze more without mosquitoes!). For doors, consider a screen door or at least a security chain to keep it from swinging wide open. Use door stoppers or latches to secure doors in an open position so they don’t slam. And never leave ground-floor windows open unattended if security is an issue in your area. Basically, plan for the consequences of airflow – the wind can be surprisingly strong when it tunnels through, so respect it.
Mistake 6: Expecting Miracles on a Dead Calm Day
Sometimes, the atmosphere just won’t cooperate. If there’s literally no wind outside, even the best cross-ventilation setup won’t conjure a breeze. You might crack all the right windows and still feel like you’re in a warm soup.
How to avoid it: Recognize when it’s a no-wind situation. On those days, you might need to switch to vertical ventilation (opening high windows or skylights to let hot air rise out) or resort to fans. One trick: if it’s cooler outside at night but calm, you can use a window fan on one side (blowing out) to simulate that leeward pull – it’s not “natural” ventilation anymore, but it jump-starts it. Also, sometimes a tiny breeze picks up late in the evening; be ready to capitalize on it by having your windows set for the night breeze (which brings us to our pro tips next!).
Avoid these pitfalls, and you’ll be well on your way to mastering the art of catching the wind. Now, let’s elevate your game with some pro tips that go beyond the basics – the kind of hacks and insights that will make you the cross-breeze champion of the neighborhood.
Pro Tips to Take Your Breeze Game to the Next Level
You’ve got the basics – now it’s time to go pro mode. These tips will help you squeeze every last bit of cool comfort out of natural ventilation, turning your home into an airy oasis even on toasty days:
Pro Tip #1: Time it Right (Night Flushing)
The strategy of night flushing could be a game-changer for you. This means throwing open windows after sunset (when outside air cools down) to flush out the heat accumulated in your house. Let that cool night breeze sweep through all night (if it’s safe to do so). By morning, your walls and floors have shed heat, making the next day more tolerable. Then in the morning, shut the windows to keep the cool in as the day heats up. It’s a natural cooling tactic that can significantly drop indoor temps. To learn more on staying cool without cranking the AC, check out our guide on How to Keep Your Home Cool Without AC – it’s full of tricks like this (your future self, fanning on the couch, will thank you!).
Pro Tip #2: Leverage the Stack Effect
Okay, we hyped horizontal ventilation, but don’t ignore vertical helpers. Hot air rises, so if you have an upstairs or high vents, open those as part of your strategy. For example, on a hot afternoon, open an upper stairwell window or a skylight as your exhaust, and open a ground-floor window on the windward side as intake. This combo uses both wind and buoyancy to turbocharge the airflow. The warmest air escapes up high, sucking cooler air from below. It’s like giving your natural ventilation a booster rocket. Just remember to close the skylight later if it cools down, or you might lose too much heat on a chilly night.
Pro Tip #3: Use Fans with the Wind
We know, we’re doing this without mechanical help ideally. But if you have ceiling fans or portable fans, you can use them to assist your cross-breeze. A fan placed near a window can either draw air in or push it out, enhancing the natural flow (this is basically converting to hybrid ventilation, but hey, comfort is king). For instance, put a box fan facing outward in a leeward window – it will pull air through the house faster, which in turn drags more wind in from the windward side. Or use a ceiling fan to circulate the incoming breeze more evenly around a big room. The key is fans should complement, not fight, the natural direction of airflow. Used wisely, a small fan boost can make a gentle breeze feel like a glorious gust.
Pro Tip #4: Mind Humidity and Temperature Differentials
Cross-breezes not only cool by air movement, but also by letting moisture evaporate off your skin. If you live in a very humid area, the breeze might feel less effective (because the air is already moist). In those climates, try to ventilate in the less humid parts of the day (often mornings or evenings). Also, remember that ventilation will only cool towards the outdoor air temperature – it can’t magically make 90°F outdoor air feel like 70°F. What it can do is make 90°F feel like 85°F by that wind-chill effect on your skin. So if it’s brutally hot outside, you might still need other cooling methods. Use natural ventilation when outside air is cooler than inside or at least not excessively hot/humid. A good tip is to keep sun out during the day (blinds, shades) and then ventilate when outside temp drops. It’s a one-two punch for comfort: block heat gain, then usher in cooler air.
Pro Tip #5: Upgrade Your Hardware (Smart Ventilation)
If you’re really serious about breeze maximization, consider some home improvements. For example, install operable vents high up (like attic vents or high transom windows) that you can open in summer. This lets hot air out at the top while drawing in cooler air below. Switch to casement or awning windows in key rooms if you currently have fixed or hard-to-open ones – the increase in airflow can be dramatic. Even something as simple as adding a screen door to your front or back door can let you keep it open more often without bugs or security worries. For the tech-savvy, there are now automated window openers and climate sensors – imagine windows that automatically open when it’s cooler outside than inside, or when a nice breeze kicks up. It’s like having Jarvis from Iron Man as your personal breeze butler. While these upgrades cost money, they can pay off in comfort and lower AC bills. Plus, it’s just really cool to say, “Oh, my house breathes on its own.”
Pro Tip #6: Clean and Maintain Openings
It’s not glamorous, but give your windows and vents some TLC. Lubricate hinges and sliders so you can open them fully and quickly when needed. Clear any clutter or plant growth outside that might block airflow to a window. If you have mesh screens, keep them clean – a dusty screen can actually reduce airflow. In fact, some high-tech screens boast better airflow; if yours are old and clogged, replacing screens could subtly improve your breeze. Also, consider ventilation boosters like trickle vents or door undercuts (small gaps under doors) that allow a bit of flow even when things are shut – handy for mild days or when you want some privacy but not stuffiness.
Pro Tip #7: Be Creative and Adaptive
Every house is different, and part of becoming a breeze ninja is learning the quirks of your space. Maybe you discover that opening the kitchen window actually draws more air through the living room due to how the hall is shaped. Or that a small gap is better than fully open in some weird spot. Don’t be afraid to experiment. On a windy day, try different combinations and use a simple ribbon or tissue held at doorways to see the airflow direction. It can be almost fun – like being a weather scientist in your own home. Over time, you’ll have an intuitive sense: “It’s 5 PM and the wind’s from the south – I’ll open the bedroom and patio door.” When you reach that point, congratulations, you’ve earned your Cross-Breeze Black Belt.
By using these pro tips, you’ll maximize comfort and minimize the need for mechanical cooling. There’s something very satisfying about coming home, opening a couple of windows just so, and feeling the place instantly come to life with a cool breeze. It’s a little bit of daily magic powered by nature and know-how.
Conclusion
Windows and doors are a lot more powerful than they look. With the right technique, they turn your home into a wind tunnel (the good kind) that keeps you cool, comfortable, and breathing easy. We started with a simple idea: when performing wind-assisted natural horizontal ventilation, windows and doors should be your go-to tools. Now you’ve learned how to wield those tools like a pro – from understanding wind pressure to avoiding common pitfalls, and even supercharging the breeze with some expert tricks.
As a quick recap, remember to always pair an inlet and outlet, start with the downwind opening, and give the air a clear path to travel. Use the natural rhythm of the day – cooling breezes in the morning and evening – to your advantage. And don’t shy away from a little trial and error; every house has its sweet spots for catching the wind.
On a broader level, embracing natural ventilation isn’t just about comfort – it’s also about living a bit more sustainably and in tune with your environment. You’ll likely find your home feels fresher, drier (in a good way), and just more pleasant when you regularly let it breathe. Plus, your AC gets to take some well-deserved breaks, which can save on those energy bills and extend the life of your cooling system.
Feeling inspired to tweak your living space for better airflow? Great! Take a stroll through HomeRevista for more ideas to elevate your home life. You might enjoy our deep dive on the Best Windows for Ventilation if you’re considering a remodel, or perhaps read about smart ways to design your space for comfort. And if you loved this stylish spin on home comfort, stick around – we’ve got plenty more up our sleeves to make your home the ultimate haven.
Now, go forth and conquer the art of the breeze. May your rooms be ever airy and your days cool and comfortable, all thanks to the humble magic of windows, doors, and a little wind. Enjoy the fresh air!