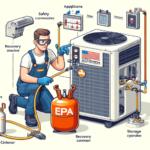
Achieving the required recovery vacuum is a critical step in HVAC maintenance, but what happens next is just as important. Learn what should be done after reaching the required recovery vacuum on an appliance to ensure safety, efficiency, and compliance with industry standards. Follow this guide for actionable steps and expert tips.
For more general guidance on appliance repair, check out our comprehensive Appliance Repair Guide .
Why Is the Recovery Vacuum Important?
The recovery vacuum removes air, moisture, and contaminants from your system. Without proper evacuation, these elements can reduce cooling efficiency by up to 30% , damage the compressor, or even cause system failure (Source: AHRI ). Once you’ve reached the required vacuum level, the next steps are crucial to maintaining system integrity. Let’s dive into the essential actions you need to take.
If you’re dealing with appliance repair deadlines, it’s important to understand the factors that can impact timelines. For example, certain situations may not justify delays—learn more in our article on Which of the Following Cannot Be Used as a Reason to Extend Appliance Repair Deadlines .
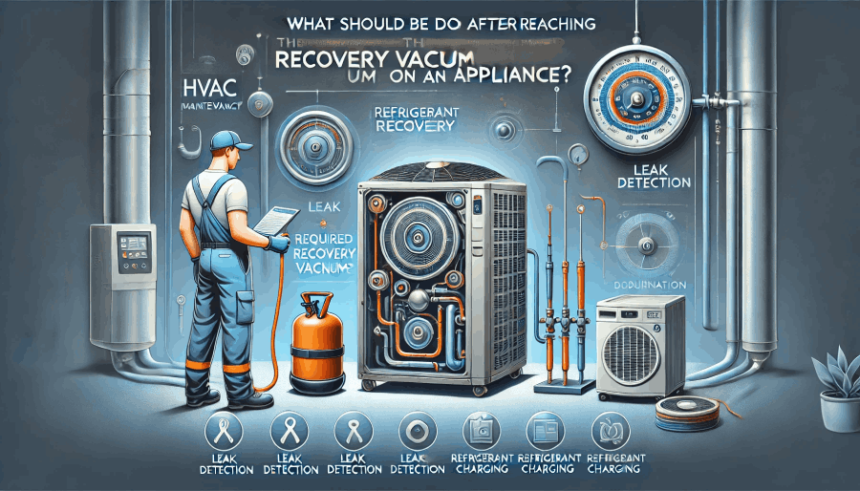
What Should Be Done After Reaching the Required Recovery Vacuum on an Appliance?
- Monitor the Vacuum Level (Standing Vacuum Test)
- Perform a Leak Check
- Break the Vacuum with Refrigerant
- Charge the System with Refrigerant
- Conduct a Final Leak Check
- Allow the System to Cool and Open It Safely
- Document the Process
Once you’ve achieved the required recovery vacuum, follow these critical steps to ensure the system is ready for operation:
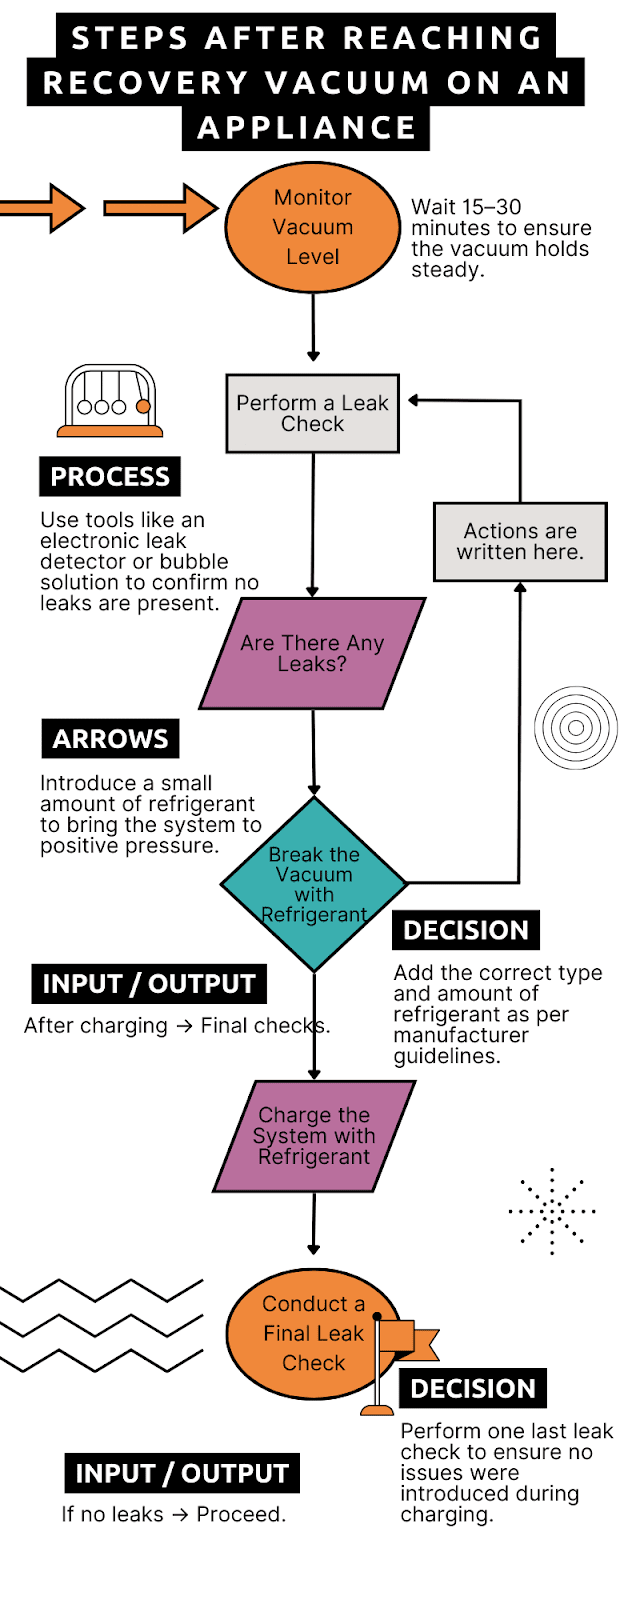
1. Monitor the Vacuum Level (Standing Vacuum Test)
After achieving the required vacuum, wait 15–30 minutes to observe if the vacuum holds steady. This standing vacuum test ensures the system is leak-free. If the vacuum level rises, it indicates potential leaks or moisture in the system.
- Why It Matters: A stable vacuum confirms the system is ready for the next step—charging with refrigerant. According to the EPA, improper evacuation can lead to refrigerant contamination , which contributes to environmental harm (Source: EPA Guidelines ).
- Pro Tip: Use a calibrated micron gauge for accurate readings. For more details on tools and equipment, refer to our Appliance Repair Guide .
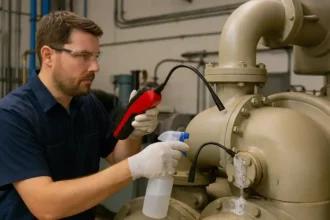
2. Perform a Leak Check
Once the vacuum holds steady, conduct a thorough leak check using tools like an electronic leak detector or bubble solution. Even small leaks can lead to inefficiencies and costly repairs. Studies show that undetected leaks account for up to 40% of HVAC system failures (Source: HVACR Industry Report ).
- Key Insight: Double-check all connections, valves, and seals to ensure there are no weak points. Proper leak detection is a cornerstone of effective appliance repair, as outlined in our Appliance Repair Guide .
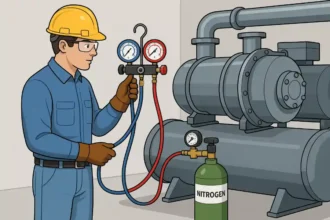
3. Break the Vacuum with Refrigerant
If the vacuum is stable and no leaks are detected, break the vacuum by introducing a small amount of refrigerant into the system. This brings the system to a slightly positive pressure, preventing air or moisture from entering when opened for further work.
- Why Not Nitrogen? While nitrogen is sometimes used in specific applications, refrigerant is preferred for breaking the vacuum in HVAC systems. The AHRI recommends using refrigerant to maintain system compatibility (Source: AHRI Standards ). For more information on handling refrigerants safely, visit our Appliance Repair Guide .
4. Charge the System with Refrigerant
After breaking the vacuum, charge the system with the appropriate type and amount of refrigerant as specified by the manufacturer. Use proper charging techniques, such as weighing the refrigerant or using superheat/subcooling methods, to ensure accuracy.
- Common Mistake to Avoid: Overcharging or undercharging can harm system performance. According to a study by the Department of Energy , improper refrigerant levels can increase energy consumption by 10–20% (Source: DOE Energy Efficiency Report ). To avoid common mistakes, refer to our detailed Appliance Repair Guide .
5. Conduct a Final Leak Check
Perform one last leak check after charging the system to confirm no leaks were introduced during the process. Use an electronic leak detector or bubble solution for this step.
6. Allow the System to Cool and Open It Safely
Before turning off the vacuum source, allow the system to return to ambient temperature and pressure. Then, open the system to the atmosphere by releasing the pinch clamp or removing the tubing. This prevents back-suction and contamination.
- Safety Focus: Following the correct sequence—cool, open, and then turn off the vacuum—is crucial for both safety and effectiveness. The EPA emphasizes this step to prevent refrigerant loss and environmental harm (Source: EPA Safe Handling Practices ). For more safety tips, explore our Appliance Repair Guide .
7. Document the Process
Record the vacuum level achieved, the duration of the standing vacuum test, and any other relevant details. Proper documentation ensures compliance with regulations and provides a reference for future troubleshooting.
- Industry Standard: Documentation is required by the Clean Air Act to ensure compliance with refrigerant handling laws (Source: EPA Clean Air Act ). For a deeper dive into regulatory requirements, check out our Appliance Repair Guide .
Common Mistakes to Avoid
To ensure success, avoid these common mistakes:
- Skipping the standing vacuum test.
- Disconnecting equipment too early.
- Ignoring leak checks.
- Using incorrect tools or methods.
- Overcharging or undercharging the system.
- Neglecting safety protocols.
For more insights into avoiding common appliance repair pitfalls, read our article on Which of the Following Cannot Be Used as a Reason to Extend Appliance Repair Deadlines .
Additional Tips for Success
Follow these tips for a smooth and successful process:
- Use high-quality, calibrated equipment.
- Follow manufacturer guidelines for vacuum levels and charging procedures.
- Allow sufficient time for the standing vacuum test.
- Perform multiple leak checks at different stages.
- Educate yourself on environmental regulations.
- Learn More: Visit the EPA’s Refrigerant Management Page for detailed guidance on safe practices. For additional tips, explore our Appliance Repair Guide .
FAQs About Recovery Vacuum Procedures
What is the purpose of a standing vacuum test?
The standing vacuum test confirms the system is leak-free and ready for refrigerant charging. According to the AHRI, this step reduces the risk of system failure by up to 50% (Source: AHRI Best Practices Guide ). For more details, refer to our Appliance Repair Guide .
How long should I wait during the standing vacuum test?
Typically 15–30 minutes, depending on the system and manufacturer guidelines.
Can I use nitrogen to break the vacuum?
While nitrogen is used in some applications, refrigerant is typically preferred for breaking the vacuum in HVAC systems. Refer to the AHRI Standards for more information. For practical advice, check out our Appliance Repair Guide .
What happens if the vacuum doesn’t hold?
A rising vacuum level indicates potential leaks or moisture in the system, which must be addressed before proceeding.
Why is documenting the process important?
Documentation ensures compliance with regulations and provides a reference for future troubleshooting or audits. The EPA mandates documentation for refrigerant recovery (Source: EPA Compliance Guidelines ). Learn more about documentation best practices in our Appliance Repair Guide .
Conclusion
Reaching the required recovery vacuum is only half the job. By following the steps outlined above—monitoring the vacuum, performing leak checks, charging the system, and documenting the process—you can ensure your appliance operates efficiently and safely. Now that you know what should be done after reaching the required recovery vacuum on an appliance , put these tips into practice and share your experiences in the comments below!
For more detailed guidance, visit these authoritative resources:
And don’t forget to explore our internal resources: