
Vinyl plank flooring makes your home look fresh and stylish. It’s cheap and tough, but common mistakes when installing vinyl plank flooring can mess it up.
New DIYers often hit problems like wobbly floors or gaps. This guide shares easy fixes for these errors. We’ll use simple steps and real tips to help you get it right.
Vinyl plank flooring, or LVP, is super popular. Over 30% of U.S. homes use it because it’s water-resistant and easy to clean, says the Floor Covering Institute.
But a bad setup can ruin even top brands. Let’s jump in and learn how to avoid trouble.
Why Doing It Right Matters
Vinyl plank flooring looks like wood but is made of strong plastic. Mess-ups like skipping prep or ignoring gaps can make floors buckle or split.
These issues make floors look bad and wear out fast instead of lasting 20 years; they might fail in two.
About 40% of floor problems come from bad installs, says the National Wood Flooring Association. Doing it right saves money and keeps warranties safe.
Brands like LifeProof give 25-year warranties, but only if you follow their rules.
Get Your Space Ready
Before you start, clear the room. Measure it twice to know how much flooring you need and add 10% extra for cuts. Pull up old carpet or tiles. If you keep old floors, make them smooth.
You need simple tools: a knife, a rubber hammer, spacers, and a pull bar. No fancy stuff required. Wear knee pads to stay comfy.
Common Mistakes When Installing Vinyl Plank Flooring
Now, here are the top mistakes and how to skip them.
Mistake 1: Bad Subfloor Prep
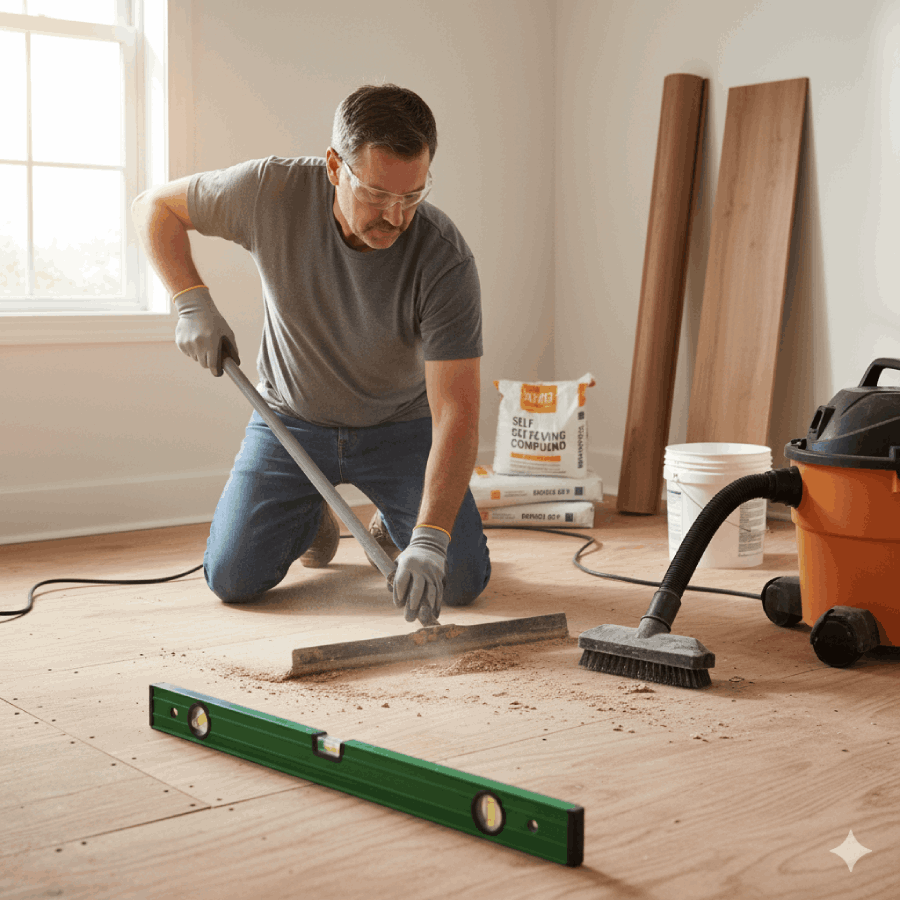
A dirty or bumpy subfloor causes common LVP flooring problems. It makes planks wobble or show bumps.
Why it happens: Dirt or nails stick up and mess with the new floor.
How to fix it:
- Clean well. Sweep and vacuum all dust.
- Fix nails. Hammer them down or pull them out. Scrape to check.
- Make it flat. Use a long stick with a level to find bumps. Fill dips with floor patch. Sand high spots.
- Check for wet spots. Use a moisture checker in basements. Wood floors should be under 12% wet.
One DIYer said a small bump made their floor squeak. Fix it first! For concrete, wait 60 days after pouring.
Mistake 2: Wet or Uneven Floors
Installing LVP over uneven or wet subflooring can cause the floors to warp or grow mold.
Why it happens: People rush and skip drying the floor.
How to fix it:
- Dry everything. Wait after spills or cleaning.
- Add a moisture barrier. Use a 6-mil plastic sheet on concrete.
- Test air wetness. Keep it at 35-65% with a hygrometer.
In wet places, 25% of vinyl fails from water, say pros. Use waterproof vinyl for bathrooms.
Mistake 3: Not Letting Planks Adjust
Not acclimating the LVP flooring makes planks shrink or grow after you lay them.
Why it happens: Planks come from cold or hot storage.
How to fix it:
- Leave planks in the room. Keep them flat for 2-3 days at 60-80°F.
- Avoid heat or cold. Don’t put them by the windows or heaters.
A DIYer saw gaps when planks weren’t adjusted. Do this for floating floors vs. glue-down vinyl.
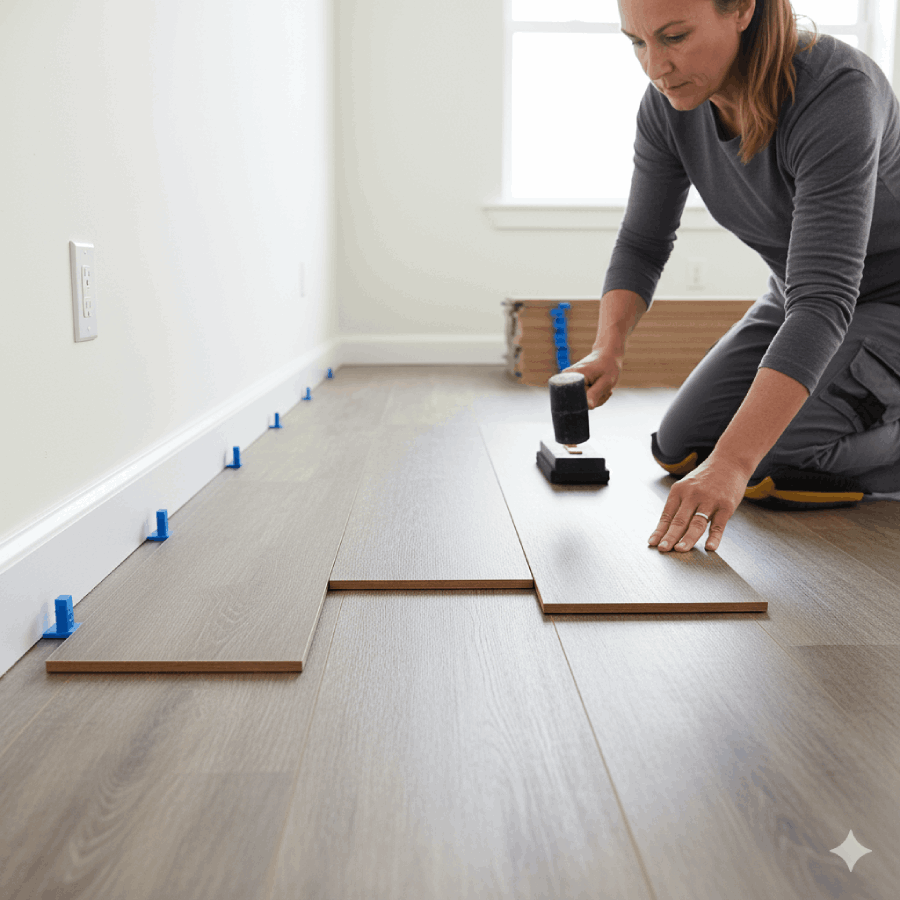
Mistake 4: Forgetting Gaps
Not leaving expansion gaps makes floors buckle when they grow.
Why it happens: People forget vinyl needs space.
How to fix it:
- Use spacers. Leave 1/4 inch by walls.
- Hide gaps. Cover with trim later.
- Check doors. Gaps stop sticking.
About 15% of floor complaints are about this, say experts. Spacers are cheap and easy.
Mistake 5: Wrong or No Underlayment
Skipping the underlayment makes floors loud or feel hard.
Why it happens: Thinking that built-in padding is enough.
How to fix it:
- Pick the right pad. Use foam or cork if planks don’t have padding.
- Don’t overdo it. Thick pads make floors wobbly.
- Best underlayment for luxury vinyl plank flooring installation: Get one with a water shield for wet spots.
Underlayment cuts noise by 20-30% in tall homes.
Mistake 6: Keeping Baseboards On
Leaving your baseboards installed makes ugly gaps or tough cuts.
Why it happens: It seems faster to leave them.
How to fix it:
- Take them off. Use a trim puller to save boards.
- Cut under doors. Use a saw for a neat fit.
- Put it back right. Leave a tiny gap above the planks.
This looks cleaner than using a quarter round.
Mistake 7: Bad Layout Planning
Misaligning the planks makes floors look crooked.
Why it happens: Starting without a plan.
How to fix it:
- Draw lines. Use chalk for straight rows.
- Start at the long wall. Go with the light.
- Check the room shape. Fix for odd walls.
Plank alignment and layout planning give a pro look.
Mistake 8: Tiny End Pieces or Same Seams
Not staggering vinyl plank seams makes floors weak and fake-looking.
Why it happens: Bad measuring.
How to fix it:
- Measure rows. Divide the room by plank size; cut starters if needed.
- Shift seams. Start new rows with cut-off pieces, 6-12 inches apart.
- No tiny ends. Keep end pieces at least 8 inches.
This looks like real wood and stays strong.
Mistake 9: Same Patterns Together
Lying similar patterns next to each other looks boring.
Why it happens: Using one box at a time.
How to fix it:
- Sort planks. Make piles by design.
- Mix them up. Keep the same patterns apart.
- Use all boxes. Spread designs evenly.
Open all boxes first to avoid repeats.
Mistake 10: Bad Cuts Around Stuff
Incorrectly cutting planks leaves gaps around vents or corners.
Why it happens: Rushing measurements.
How to fix it:
- Measure twice. Use paper shapes for curves.
- Tools needed for proper vinyl plank installation: a Knife for straight cuts, a jigsaw for corners.
- Mistakes to avoid when cutting vinyl planks around corners: Don’t cut near seams.
Place vents so one plank covers most.
Mistake 11: Ignoring Corners and Vents
Not planning for vents weakens floors.
Why it happens: Forgetting small details.
How to fix it:
- Shift rows. Keep vents off seams.
- Cut carefully. Use a square to mark.
- Get extra. Buy 10% more planks.
This keeps the floors solid.
Mistake 12: Ignoring Brand Rules
Not following the manufacturer’s guidelines breaks warranties.
Why it happens: Thinking all vinyl is the same.
How to fix it:
- Read the guide. Check for glue or gap rules.
- Pick the method. Floating floor clicks; glue-down sticks.
- Room temperature and humidity control: Keep it steady.
This stops half of all problems.
Mistake 13: Thinking You Need Fancy Tools
Thinking you need expensive tools stops you from starting.
Why it happens: Seeing pros with big tools.
How to fix it:
- Use simple tools. Knife, hammer, saw.
- Score and snap. Easy for straight cuts.
- Practice first. Try on extra pieces.
Cheap tools work great for DIY.
Mistake 14: Old Floors Not Prepped
Installing old flooring without proper preparation makes the floors uneven.
Why it happens: Trying to save time.
How to fix it:
- Pull up or smooth. Remove carpet; sand tiles.
- Level it. Use filler for dips.
- Check below. Fix any damage.
Start fresh for best results.
Mistake 15: Ignoring Light and Room Shape
Not accounting for lighting and room shape makes the floors look off.
Why it happens: Focusing only on laying planks.
How to fix it:
- Go with light. Lay planks toward the windows.
- Follow long walls. Makes rooms look bigger.
- Test first. Lay a few rows without locking.
This makes floors look natural.
Mistake 16: Not Cleaning After
Not cleaning the floor after installation traps dirt.
Why it happens: Wanting to finish fast.
How to fix it:
- Vacuum. Get all dust and spacers.
- Mop lightly. Use vinyl-safe soap.
- Wait a day. Don’t add furniture yet.
This keeps floors shiny.
Extra Tips for Awesome Floors
Here are pro tricks for great results:
- Transition strips and trim for vinyl planks: Use T-molds at doors.
- Tips for installing vinyl plank flooring in humid areas: Add water shields.
- Preventing warping and lifting in vinyl plank floors: Keep temps steady.
- Why vinyl planks separate after installation, and how to fix it: Tap back or glue.
- How to prepare a subfloor for vinyl plank flooring: Follow the steps above.
- Step-by-step guide to fixing vinyl plank flooring gaps: Fill small gaps with caulk; replace big ones.
For glue-down floors, spread glue evenly. For floating floors, make sure clicks are tight. If your vinyl plank flooring isn’t clicking together properly, it is often dirt or bad leveling.
Stories from Real Installers
“I skipped cutting the door trim and got ugly gaps,” says Brad from Fix This Build That. See his tips1.
Bunce Buildings says, “Good subfloor prep stops most problems.” Check their guide2.
Wholesale Cabinet Supply adds: “Mixing seams looks like real wood.” Read their advice3.
Flooring Facts
Vinyl plank takes up 23% of U.S. floors, says Statista, because it’s tough. But 35% of DIY jobs need fixes in a year from mistakes. Good prep lowers this.
In wet areas, moisture barriers for vinyl floors cut failures by half. Planks can grow 1/8 inch per 10 feet, so always adjust them first.
FAQs
How long should vinyl plank flooring acclimate before installation?
Let planks sit in the room for 2-3 days at 60-80°F. This stops them from shrinking or growing later.
What causes vinyl plank flooring to buckle after installation?
No gaps, wet floors, or unadjusted planks. Also, hot or cold air can do it. Use spacers and dry the floor first.
Can I install vinyl plank flooring on uneven subfloors?
No way. Bumps cause gaps or squeaks. Smooth it with filler before starting.
Common DIY vinyl flooring installation problems and solutions?
Gaps: Fix alignment or add caulk. Squeaks: Use underlayment. Buckles: Dry the floor and add gaps.
How to avoid common mistakes when installing vinyl plank flooring?
Plan rows, clean floors, adjust planks, leave gaps, and read brand rules. Measure cuts twice and mix seams.
Conclusion
Avoiding these common mistakes when installing vinyl plank flooring, like bad prep or no gaps, gives you a strong, pretty floor.
Take time to plan, use simple tools, and follow steps. Your floors will look great and last for years.

:max_bytes(150000):strip_icc()/how-to-get-acrylic-paint-off-clothes-5323500-10-742f78f12b3a4779a83b1f49d3463f60.jpg "How to Get Acrylic Paint Out of Clothes")


