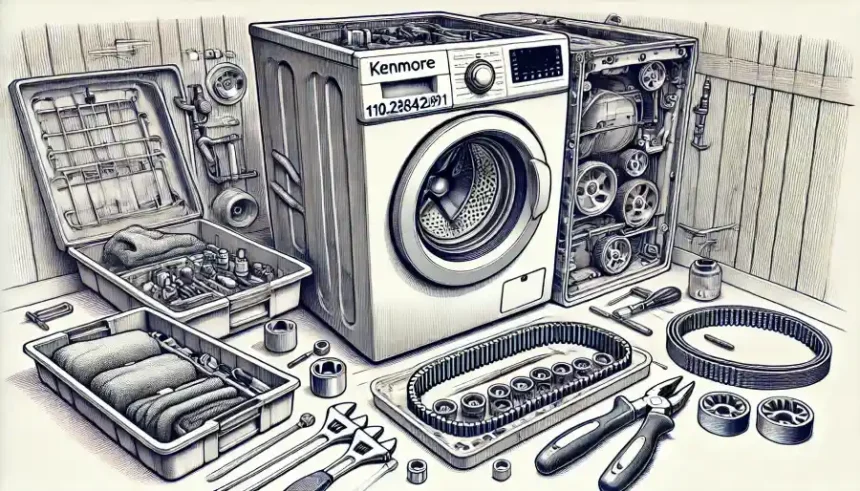
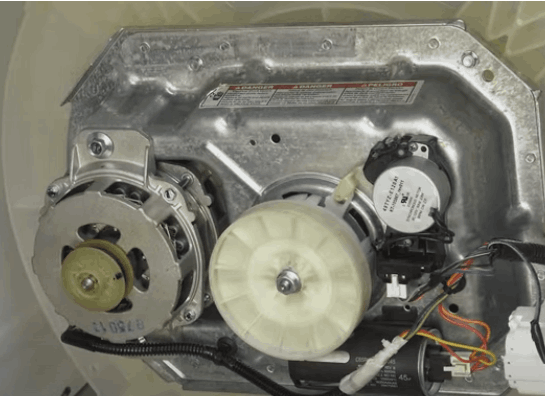
If you’re looking to replace basket drive belt on Kenmore washing machine 110.26842691, this guide will provide you with everything you need to get the job done efficiently. The Kenmore 110.26842691 is a dependable washer, but like all appliances, it requires regular maintenance to perform at its best. One essential component is the basket drive belt, which connects the motor to the drum, enabling it to spin during wash and rinse cycles.
Over time, the belt can wear out, leading to common issues such as:
- The washer failed to spin.
- Unusual squeaking or grinding noises.
- A burning smell caused by a slipping or overheating belt.
This guide will walk you through a step-by-step process to replace the basket drive belt safely. Additionally, you’ll find a helpful video guide—WASHER REPAIR: How to Install a Drive Belt in a Top-Load Washer—to make the repair even easier. By following these instructions, you can save time, money, and the hassle of calling a professional.
Tools and Materials Needed
Before you begin replacing the basket drive belt on your Kenmore washing machine (model 110.26842691), make sure you have the right tools and replacement parts. Having everything prepared will make the process smoother and more efficient.
Tools Required
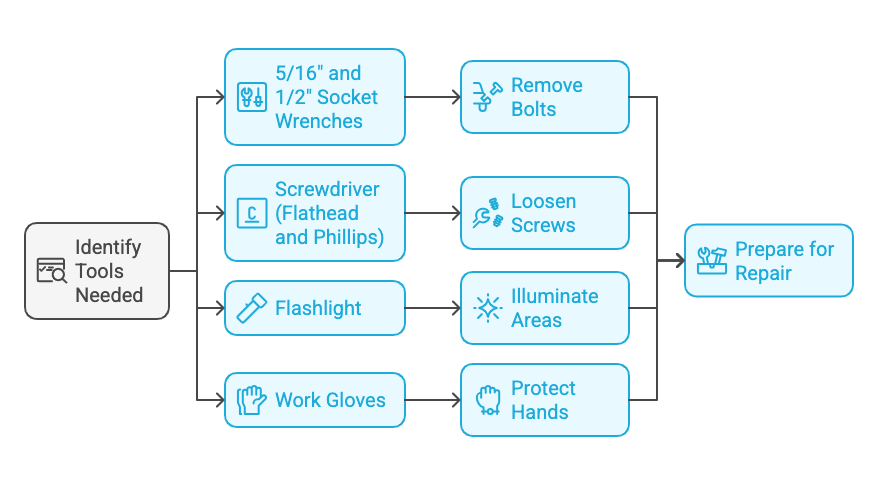
- 5/16″ and 1/2″ Socket Wrenches: Essential for removing and securing bolts during the repair.
- Screwdriver (Flathead and Phillips): Needed to loosen screws and access the belt area.
- Flashlight: Helps illuminate hard-to-see spots, especially when working under the washer.
- Work Gloves: Protect your hands from sharp edges and provide a better grip.
Replacement Parts
- Basket Drive Belt: Ensure compatibility by using the correct belt, such as W10006384, which fits most Kenmore 110 series washers.
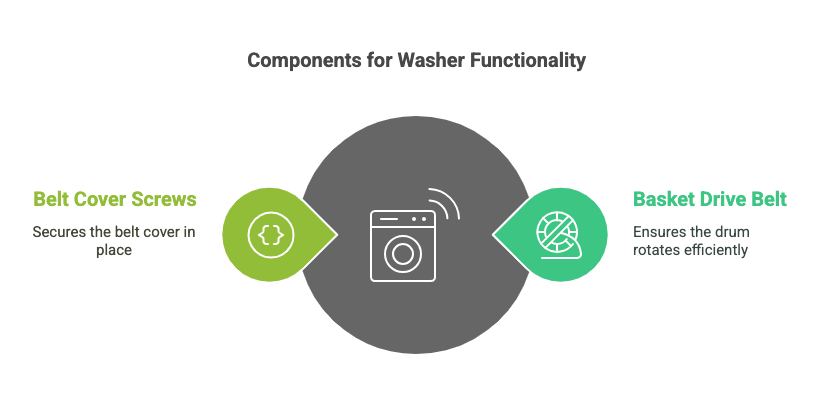
- Belt Cover Screws: If screws are missing or damaged during disassembly, replacements will be needed to secure the belt cover.
Having these tools and parts ready ensures a hassle-free repair process, saving you time and effort while restoring your washer’s performance.
Safety First
Before starting any repair on your Kenmore washing machine, prioritize safety to avoid accidents or injuries. Follow these essential tips to ensure a safe and smooth repair process:
- Unplug the Washer: Always disconnect the washing machine from the power outlet before beginning any repair work. This step eliminates the risk of electric shock.
- Shut Off the Water Supply: If your washer is connected to water lines, turn off the water supply to prevent leaks or accidental flooding during the repair.
- Wear Protective Gloves: Sharp edges and small components inside the washer can cause cuts or scrapes. Wearing gloves provides a firm grip and keeps your hands protected.
- Work in a Well-Lit Area: Ensure your workspace is well-lit to avoid mistakes and make it easier to locate screws, bolts, and the belt itself. Using a flashlight for tight spaces can also be helpful.
- Stabilize the Washer: When laying the washer on its back to access the drive belt, ensure it’s stable and won’t move unexpectedly. Use a sturdy, flat surface or have someone assist in holding the machine steady.
- Keep Tools Organized: Organize your tools and small parts (like screws or bolts) in a container or tray to prevent losing anything during the repair.
By following these safety tips, you’ll minimize risks and create a safer environment to replace the basket drive belt with confidence.
Step-by-Step Replace Basket Drive Belt on Kenmore Washing Machine 110.26842691 Guide
Replacing the basket drive belt on your Kenmore washing machine (model 110.26842691) is a straightforward process if you follow these step-by-step instructions. Here’s how to get the job done:
Step 1: Prepare the Washer
- Unplug the Washing Machine: Disconnect the washer from the power outlet to ensure safety.
- Lay the Washer on Its Back: Carefully tip the washer onto its back to access the underside. Use a sturdy surface to keep the washer stable during the repair.
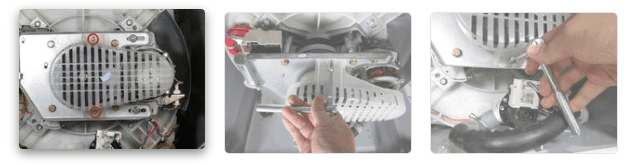
Step 2: Remove the Belt Cover
- Loosen the Screws: Use a 5/16″ socket wrench to remove the screws securing the belt cover.
- Set Aside the Cover: Take off the belt cover and place it in a safe spot for reassembly later.
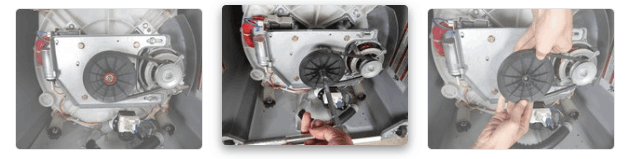
Step 3: Remove the Old Belt
- Loosen the Drive Pulley Bolt: With a 1/2″ socket wrench, loosen the bolt that secures the drive pulley in place.
- Remove the Pulley and Belt: Slide the drive pulley off and remove the old, worn belt from the washer.
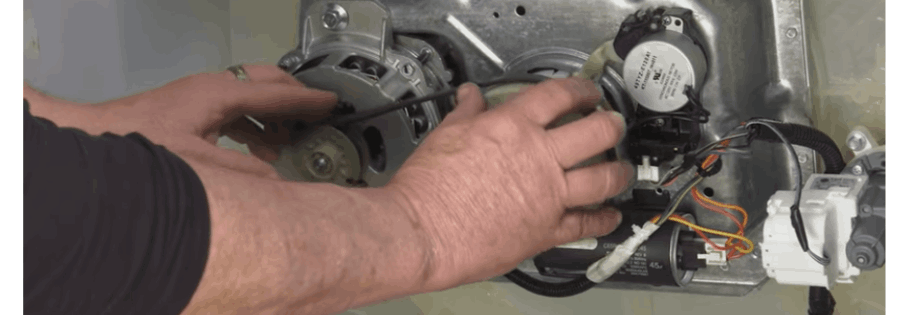
Step 4: Install the New Belt
- Position the Belt: Place the new belt around the motor pulley and the drive pulley. Ensure it is seated properly in the grooves.
- Reattach the Drive Pulley: Align the pulley and secure it in place by tightening the bolt with the 1/2″ socket wrench.
Step 5: Reattach the Belt Cover
- Replace the Cover: Position the belt cover back in place.
- Secure with Screws: Tighten the screws using the 5/16″ socket wrench, ensuring the cover is firmly attached.
Step 6: Test the Washer
- Return the Washer Upright: Carefully stand the washer back up.
- Plug it In and Test: Reconnect the washer to the power outlet and run a short cycle to confirm the new belt is working properly. Check for smooth operation and no unusual noises.
By following these detailed steps, you can successfully replace the basket drive belt on your Kenmore washing machine and restore its performance. If you encounter any issues during the process, revisit the steps or consult the accompanying video guide for further clarity.
For visual learners, watching the video guide can clarify these steps further and provide additional confidence during the repair process. By combining these instructions and the video, you’ll have your washer up and running in no time.
Troubleshooting After Replacement
After replace basket drive belt on kenmore washing machine 110.26842691, you might encounter a few issues during testing. Here’s how to troubleshoot and resolve common problems:
Washer Still Doesn’t Spin?
- Check Belt Alignment: Ensure the belt is seated properly in the grooves of both the motor and drive pulleys.
- Verify Belt Tension: The belt should be snug but not overly tight. If it’s too loose, adjust the alignment or check for a misaligned pulley.
Persistent Noise During Operation?
- Inspect for Loose Components: Ensure all screws, bolts, and the drive pulley are tightened securely.
- Examine Pulleys: Look for additional wear or damage on the motor and drive pulleys that could cause grinding or squeaking. Replace them if necessary.
Leakage During the Rinse Cycle?
- Check Hoses and Connections: Inspect all water supply and drainage hoses to ensure they are securely attached and free from cracks or leaks.
- Inspect the Tub Seal: If leaks persist, it could indicate an unrelated issue with the tub seal that may require attention.
Uneven or Unstable Movement?
- Ensure Proper Leveling: Confirm that the washer is sitting on a flat, stable surface. Adjust the washer feet if needed.
- Check for Obstructions: Ensure no foreign objects or debris are caught around the drum or under the washer.
Motor Running, But the Drum Isn’t Moving?
- Inspect the Belt: Verify that the belt hasn’t slipped off during testing. If it has, double-check the alignment and tension before reattaching.
- Assess the Motor Coupler: If the belt is fine but the drum still doesn’t move, the motor coupler may be worn and require replacement.
By addressing these common issues, you can ensure your washer operates smoothly after replacing the belt. If problems persist, refer back to the installation video or consult a professional for additional assistance.
FAQs and Community Insights
Here are some of the most frequently asked questions about replacing the basket drive belt on your Kenmore washing machine, along with insights from the DIY repair community. These tips will help you identify issues and complete your repair with confidence.
How Do I Know if the Belt is Bad?
- Signs of Wear: Inspect the belt for visible cracks, fraying, or splitting.
- Slipping During Operation: If the drum doesn’t spin or the washer makes a squealing noise, the belt may be slipping or losing tension.
- Burning Smell: This can indicate the belt is overheating due to wear or misalignment.
What Type of Belt Do I Need?
- Model-Specific Belt: Always confirm the compatibility of the belt with your washer’s model number. For Kenmore 110 series washers, a common replacement is W10006384.
- Check the Old Belt: The part number is often printed on the original belt, making it easy to match.
How Much Does It Cost to Replace a Belt?
- Belt Costs: Replacement belts typically range from $25 to $100, depending on the model and quality.
- Professional Labor: If you opt for professional repair, labor costs can add an additional $50–$150. Doing it yourself can save significantly on labor fees.
Can I Do This Repair Myself?
- Absolutely! With a little patience and the right tools, replacing a washing machine belt is a manageable DIY project. Watching the video guide can also provide additional guidance.
Community Insight: Real-Life Experiences
- “57-year-old woman fixes washer in 15 minutes!” A homeowner shared her success story of replacing the belt herself after finding the part number on the old belt and following a guide.
- “Noise but no movement?” One user discovered that their belt was slipping due to improper tension. Adjusting the alignment fixed the issue.
- “How to choose the right belt?” A user suggested checking the washer’s manual or contacting the manufacturer for precise recommendations.
By addressing these FAQs and learning from community experiences, you’ll have all the knowledge and confidence needed to successfully replace your Kenmore washer’s basket drive belt. Have more questions? Feel free to join the discussion and share your insights!
Replace Basket Drive Belt on Kenmore Washing Machine 110.26842691 – Final Words
Replace basket drive belt on Kenmore washing machine 110.26842691 is a simple yet effective DIY project that can save you both time and money. With the step-by-step guide and additional resources like a video tutorial, even beginners can confidently tackle this repair and restore their washer’s performance.
By following this guide, you can avoid the costs of professional repair services while extending the life of your appliance. If you encounter any challenges or have tips to share, we encourage you to leave a comment below. Your feedback helps others in the community and makes repairs even easier for everyone.
For additional assistance, we’ve included links to compatible replacement parts and video tutorials to ensure you have all the tools and knowledge needed to complete the job.
At At Home Revista, we’re here to help you tackle home repairs with ease. Join millions of homeowners who trust us for expert advice and practical solutions.
- Learn More: Explore our blog for detailed Kenmore washer repair guides.
- Ask or Share: Leave a comment with your questions or repair tips.
- Get Help: Connect with trusted professionals for expert assistance.
At Home Revista—your partner in smarter, simpler home repairs.